Ant Wars Map Geography and Tunnel Plans
Four nests, highway vs flank tubes, fungus pockets, kill funnels, and post-queen larvae paths.
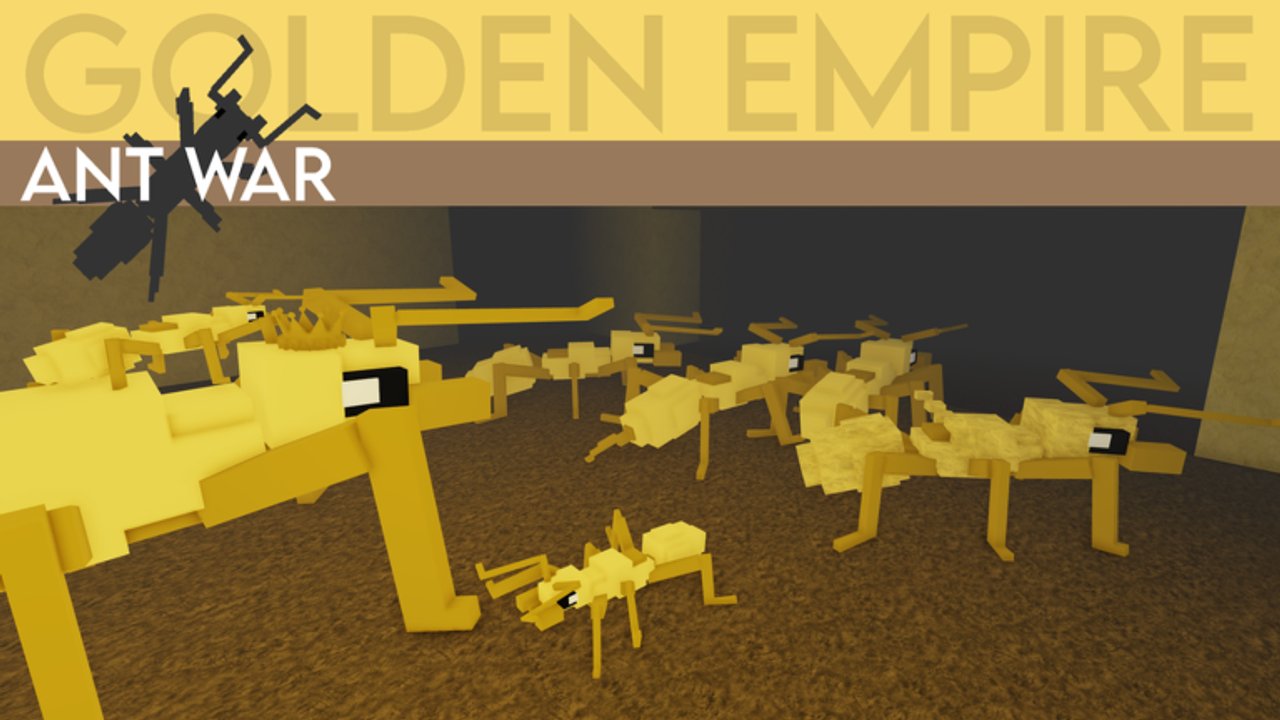
Every Ant Wars win is a geography problem first. Ant War by Chylan places four colonies on a shared underground map: Fire Nation (red), Golden Empire (yellow), Leaf Kingdom (green), and Concrete Clan (gray). Colors and spawn angles differ; combat tools do not — colony parity is cosmetic for balance, not a hidden power ladder. This guide explains nest geography concepts, highway versus flank tunnels, fungus pockets behind queens, kill funnels, Wood/Stone chokepoints, and post-queen larvae routes. Dig hit counts live on Digging and Blocks; colony flavor on Colonies; objective rules on Queen, Larvae Loot, and How to Win.
Four nests, one war
Think of the map as four throne rooms connected by soft Dirt that hardens into Soil, Compact sand, Wood, and Stone as you dig toward rivals. Your nest is both fortress and economic node: fungus behind the queen fuels Feed (T), and the ring around her decides whether Honeypots can rotate without crossing a brawl. Enemy nests are mirror problems — same block rules, different approach angles.
Because colonies are cosmetic parity, picking Fire Nation over Concrete Clan does not change Trapjaw multipliers or dig counts. Pick the nest that matches your friends, the voice call, or the spawn you already know. Then learn the tunnels, not the lore color.
Nest geography concepts
Nest ring
Clear a short loop around your queen so feeders reach fungus without pathing through the main fight. Leave pockets where Armored can stand without blocking Dig (E) sightlines. Avoid sealing the queen behind Stone you cannot re-break under pressure — trapped queens die when Feed pathing fails.
Fungus pockets
Fungus blocks sit behind / around queens and dig like Dirt (4 / 3 / 2 for Minor / Major / Supermajor). Treat them as ammo crates, not decoration. Pre-chip a few blocks so emergency Feeds are one or two hits from a full drop. After 30:00, queen passive regen (3 HP/s) stops — fungus routes become the only sustain. Full Feed rules: Heal the Queen.
Kill funnels
A kill funnel is a deliberate narrow approach into your nest where defenders hold the advantage. Keep one trustworthy tube as the “front door” instead of opening every wall. Armored and Acid own funnels; Trapjaw punishes divers who overcommit. Over-digging your own nest gifts free angles to Acid spit and multi-direction dives.
Breach foyer
On offense, carve a small staging chamber just before the enemy queen room. Group there, wait for the last Stone dig, then enter together. Solo Supermajors who break the final block with nobody behind them often die in the hole while defenders reseal.
Highway vs flank tunnels
Main highway
The highway is your wide primary lane toward the nearest living rival queen. Supermajors and dual-mutation carriers need this path for traffic. Lead diggers (often Major or Supermajor Armored / Trapjaw) own the highway. Signal Follow so the pack stays on one tube instead of cutting three unfinished caves.
Highway goals:
- Reach enemy nest geography before the DNA-double window if possible
- Stay wide enough for Supermajor traffic and Honeypot escorts
- Avoid decorative side caves that never connect
Flank tubes
Flanks are narrower side digs for Acid poke, Stinger harass, larvae theft, and reverse dives. Flanks should connect to the highway or nest ring eventually — orphan tubes waste DNA and lives. Minim and Minor Acid love flanks; Supermajors usually belong on the highway unless a flank already opens onto the queen room.
| Tunnel type | Best users | Purpose |
|---|---|---|
| Highway | Supermajor, Trapjaw, Armored | Main siege traffic |
| Flank | Acid, Stinger, Minim | Poke, ambush, larvae |
| Nest ring | Honeypot, nest digger | Fungus and Feed access |
| Kill funnel | Armored, Acid, Trapjaw | Controlled defense door |
Wood and Stone chokepoints
Soft Dirt falls fast. The real map control sits on Wood (7 / 5 / 4) and Stone (8 / 6 / 4) — full table on Digging and Blocks. Plan size upgrades before you commit a Minor squad to a Stone gate: Major costs 3 DNA, Supermajor 6 DNA, and both cut dig counts hard.
Chokepoint habits:
- Defenders: leave Wood/Stone doors as kill funnels; do not strip every hard block “just in case.”
- Attackers: assign Supermajors to Stone, Majors to Wood, and signal before the last hit.
- Both sides: under 30:00, Combo Mutations turn chokes into blenders — bank DNA with that fight in mind (DNA).
Compact sand (6 / 4 / 3) is the mid-map tax. If your highway stalls on sand, buy Major before you waste a minute of Minor chips.
Reading the four colonies on the dig
You do not need memorized coordinates for every pub. You need a checklist:
- Which colonies still have living queens?
- Which highway is shortest to the weakest nest?
- Where are fungus pockets relative to the fight noise?
- Can a flank steal larvae after the first queen falls without abandoning your own door?
Fire Nation, Golden Empire, Leaf Kingdom, and Concrete Clan answer those questions with different spawn angles, not different rules. Scout as Minor, listen for dig audio, and update the mental map every few minutes. Colony identity notes: Colonies.
Post-queen larvae routes
When a queen dies, that nest becomes an economic node. Larvae spawn for carriers who return them to your Loot Dropoff — DNA payout, badge progress (Looter), and denial for rivals. Map the route before the kill if you can: which flank exits the dead nest toward your dropoff without crossing the hottest highway?
Assign specialists (often mid sizes or Minim) to larvae while Supermajors rotate to the next living queen. Do not send the entire roster into a corpse nest while another colony flanks your fungus. Full loop: Larvae Loot.
Dig counts reference (do not guess)
| Block | Minor | Major | Supermajor |
|---|---|---|---|
| Dirt | 4 | 3 | 2 |
| Soil | 5 | 4 | 3 |
| Compact sand | 6 | 4 | 3 |
| Wood | 7 | 5 | 4 |
| Stone | 8 | 6 | 4 |
| Fungus | 4 | 3 | 2 |
Memorize the pattern, then open Digging and Blocks mid-match when you forget a number. Digging enables DNA income from combat, healing, and larvae — it is not a separate scoreboard fantasy.
Squad map roles
- Lead digger: owns the highway and Stone projects; pings Follow.
- Flanker: opens side tubes; contests larvae; pokes with Acid/Stinger.
- Nest digger / Honeypot: fungus pockets, nest ring, Heal answers.
- Door guard: holds the kill funnel so the highway can stay aggressive.
- Flex: swaps to whichever wall or queen call is failing.
Silent solo digs into Stone still lose rounds. Geography plus Signals plus DNA timing beats raw dig spam.
Common map mistakes
- Opening every nest wall and calling it “vision.”
- Three unfinished flanks and zero highway.
- Stripping all fungus before the regen cutoff.
- Ignoring larvae routes after the first queen kill.
- Assuming a colony color is stronger — parity is cosmetic.
- Digging forever while no path exists to a living enemy queen.
Closing the map with the win condition
Tunnels exist to delete queens and convert dead nests into DNA. Use highways for the payload, flanks for information and theft, fungus pockets for sustain, and Wood/Stone doors as deliberate chokes. When the clock hits the Combo window and regen dies, the colony with clearer geography usually lands the last dive first.
Cross-read How to Win for role timing, Queen for throne-room jobs, and Larvae Loot so every fallen nest pays you. Dig smart, not just more.
Frequently Asked Questions
Quick answers for Ant Wars colony fights.
Are the four Ant Wars colonies balanced the same?
Yes. Fire Nation, Golden Empire, Leaf Kingdom, and Concrete Clan differ by color and nest geography. Combat tools, dig counts, and DNA rules are shared — cosmetic parity.
What is the difference between a highway and a flank tunnel?
The highway is the wide primary lane for Supermajor siege traffic. Flanks are narrower side tubes for poke, ambush, and larvae routes that should eventually connect to the main plan.
Where are fungus pockets and why do they matter?
Fungus sits behind or around queens and digs like Dirt (4/3/2). It fuels Feed heals, which become mandatory after queen regen stops under 30:00.
How should I use Wood and Stone chokepoints?
On defense, keep hard blocks as kill funnels. On offense, send Majors/Supermajors to cut Wood (7/5/4) and Stone (8/6/4) and stage in a breach foyer before the last dig.
What changes on the map after a queen dies?
The dead nest becomes a larvae farm. Plan a flank route to your Loot Dropoff, assign carriers, and keep Supermajors moving toward the next living queen.